I recently picked up a Fireflies PL47G2 and didn’t see a flashing how-to out there for it, so I figured I’d write something up. This may work on other Fireflies lights but the PL47G2 is the only one of theirs I have so far.
Required Reading
Before starting, read over the guide for flashing the Sofirn LT1 as the procedure and pin layout is essentially the same. The pin layout on the LT1 is 3 over 3, the PL47G2 is 3 over 4 but one of the pins on the bottom row isn’t used.
Adapt the Hank Flashing Kit
I used the flashing kit from Hank (4 over 2 pinout) so as with the LT1 method it requires adapting the connection to the different pin layout plus some method of connecting an extra pin. I used a multimeter lead with a thin probe on one end and alligator clips on the other, clipped to a similar jumper wire to the ones mentioned in the LT1 thread.
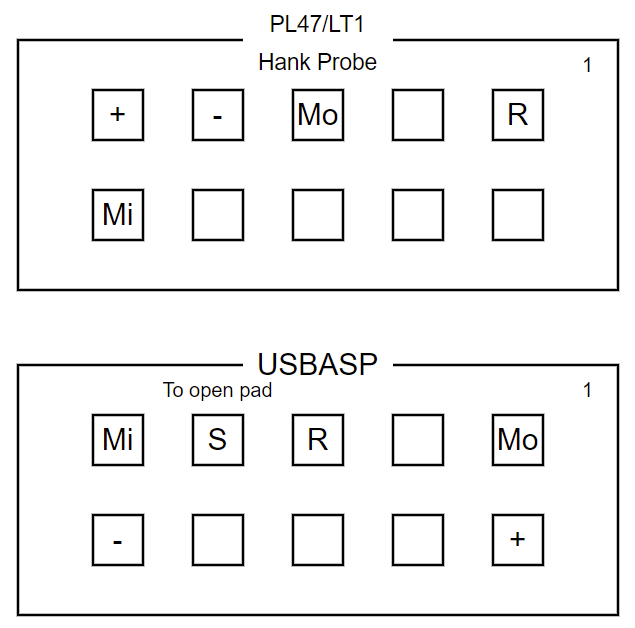
Since writing this originally, I ordered some pogo pins and figured out that they can push fit into a dupont connector, so when I updated the light again, I used that instead of a multimeter probe.
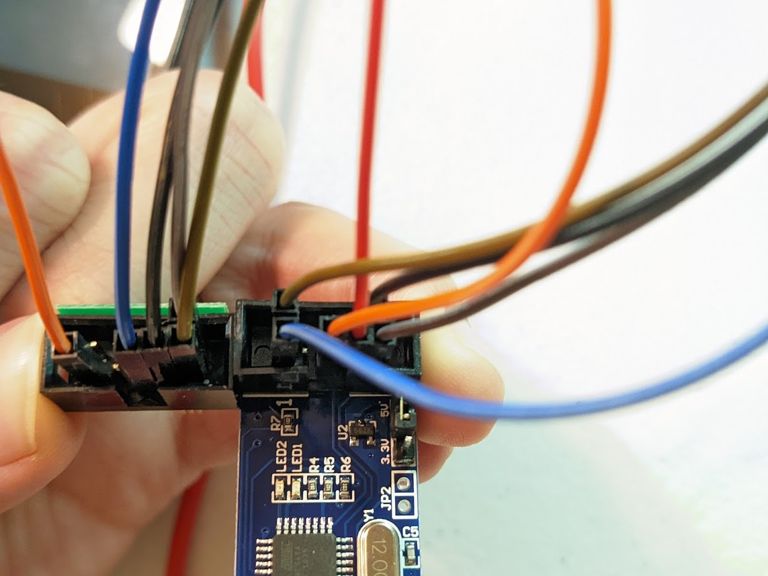
Here are the connectors on my flashing kit with the jumper wires in place. The red wire on the right is going to the multimeter lead.
Firmware File
Grab the latest Anduril build from http://toykeeper.net/torches/fsm/anduril2/
-
If the PL47G2 uses emitters other than Nichia 219, download
ff-pl47g2.hex -
If the PL47G2 uses Nichia 219 emitters, use either the
pl47-219variant or compile a variation of the pl47g2 firmware with the lower FET PWM levels safe for use with the Nichia emitters.The
pl47-219firmware disables low aux levels so it’s not ideal for use on the PL47G2.See this commit on my fork of Anduril 2 for an example of the necessary changes to make a custom
pl47g2-219variant. I have also posted a pre-compiled version of the hex file for this variant.
Flashing Software
I used zflasher AVR on Android to perform the update, but there are other ways (like avrdude or similar). I’ll stick to zflasher, though.
Copy the .hex file somewhere on the phone/tablet accessible to the app (e.g.
Downloads directory).
Connect the phone/tablet to the flash kit (e.g. using USB C to A Female adapter or OTG cable)
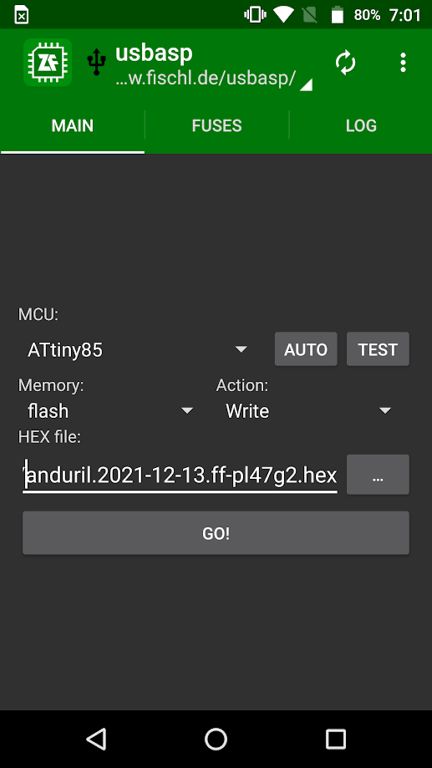
Open the app and set it up as follows:
- MCU: ATtiny85
- Memory: Flash
- Action: Write
- Load the hex file with the firmware
Connect the Pins
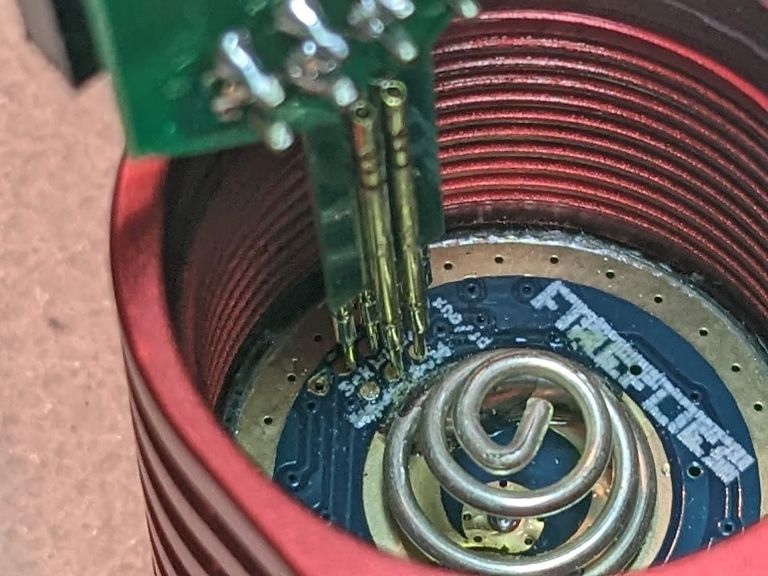
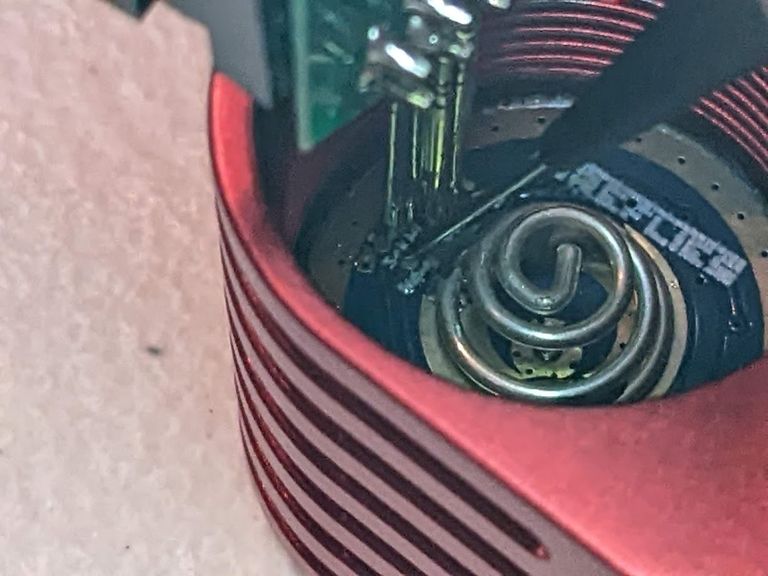
Line up pogo pins on the flashing kit such that one pin on the row of 4 is NOT touching anything. Should be like so:

Xis an open pad that is not usedPis a pad touched by a pogo pinNis a pogo pin not touching a padOis an open pad which is where the extra lead goes (multimeter for me)
Test and Update Firmware
In the app, run a test first. If it fails, fix the error and try again. Most likely it wasn’t making contact with all the pins.
If the test succeeds, then write and wait for it to write and verify.
Final Thoughts
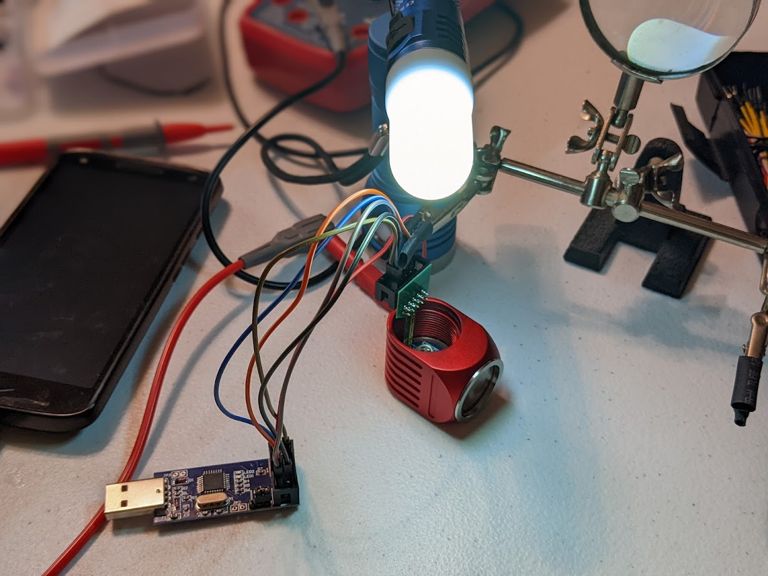
Bonus shot of the cobbled together setup to make it happen, with a guest appearance from a D4Sv2 and SC31 Pro working together as a little task light:
HQ ProgKey / Other USB ASP Boards
I ordered a couple batches of these HQ ProgKey PCBs from OshPark to make an adapter I could use for these Fireflies lights.
I used some solder paste to reflow pogo pins and connecting pins onto the adapter and then wired it up to match the pin layout.
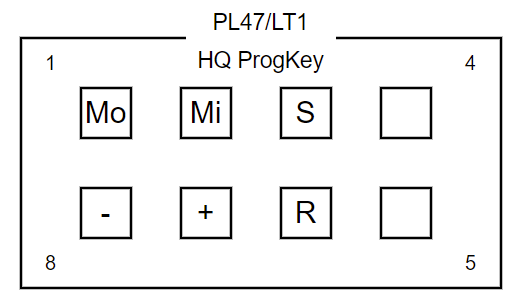

I had some trouble initially getting it to work, but as it turns out the problem was the usbasp boards I had purchased from Amazon. The adapter works fine with the board from Hank’s flashing kit, so I’ll keep using that for now.
Adapted from my post on Reddit.